Getting Started Guide for Using the RWA Core Wallet and Mining
This wallet is a comprehensive and highly secure client for RWA. First, create a folder on your computer, preferably named 'RWA' for easy identification. You can download the installation package from the official website of the RWA public chain. Packages obtained from other sources are also acceptable.
If using the rwa.zip installation package, be sure to extract it first—this is the first step.
Do not download the installation package repeatedly ,as this complicates the mining process (you’ll need to select which wallet to designate for mining, which can be confusing for most users). Therefore, avoid duplicate downloads.
The extracted package contains the following files:

Open the file named '说明'(Instructions) at the bottom, which is a Notepad document.
It includes the following:
Double-click rwa-qt.exe to launch the program. On first launch, you’ll need to create a wallet, which will generate a 'data' folder in the current directory.
To start mining, first close rwa-qt.exe, then copy the rwa.conf file into the 'data' folder. After that, restart rwa-qt.exe and finally double-click start.bat to begin mining.
Note: Be sure to back up the 'data' folder to avoid potential coin loss.
Simply follow the Notepad instructions: open the third-last item to create the wallet. If mining, close the wallet, reopen the third-last item, and then open the second-last to start mining.
If the 'data' folder already contains the rwa.conf file, there is no need to copy it again—just check the folder to confirm.
Mining requires block synchronisation, which takes time. Please be patient. As the RWA blockchain grows, synchronisation will take progressively longer.
When you see the following two interface windows, it means mining has begun: the black window indicates the mining program is running; the white one is the wallet.
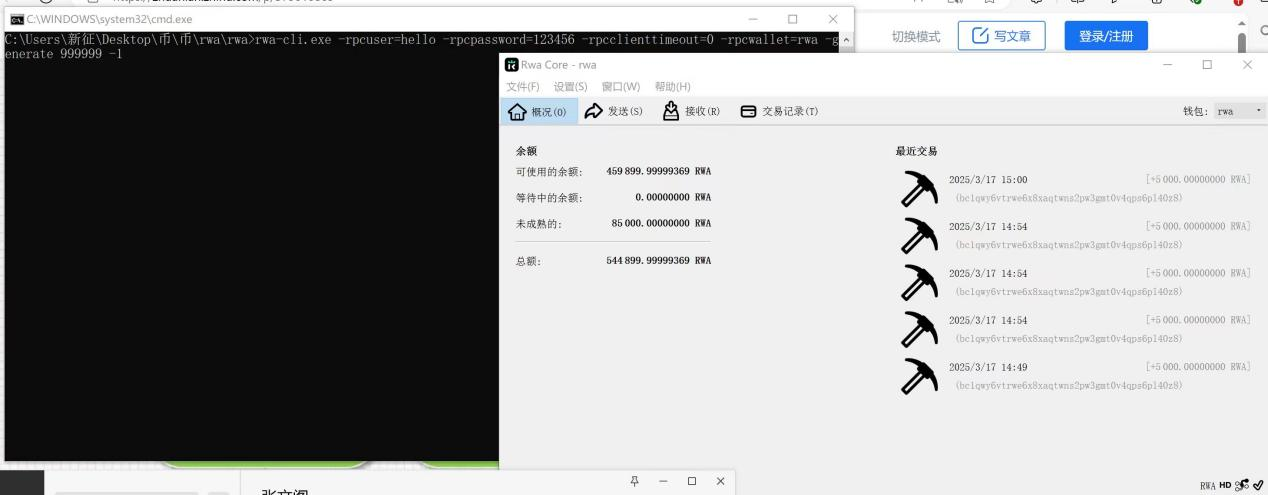
These are the two interfaces expanded separately:
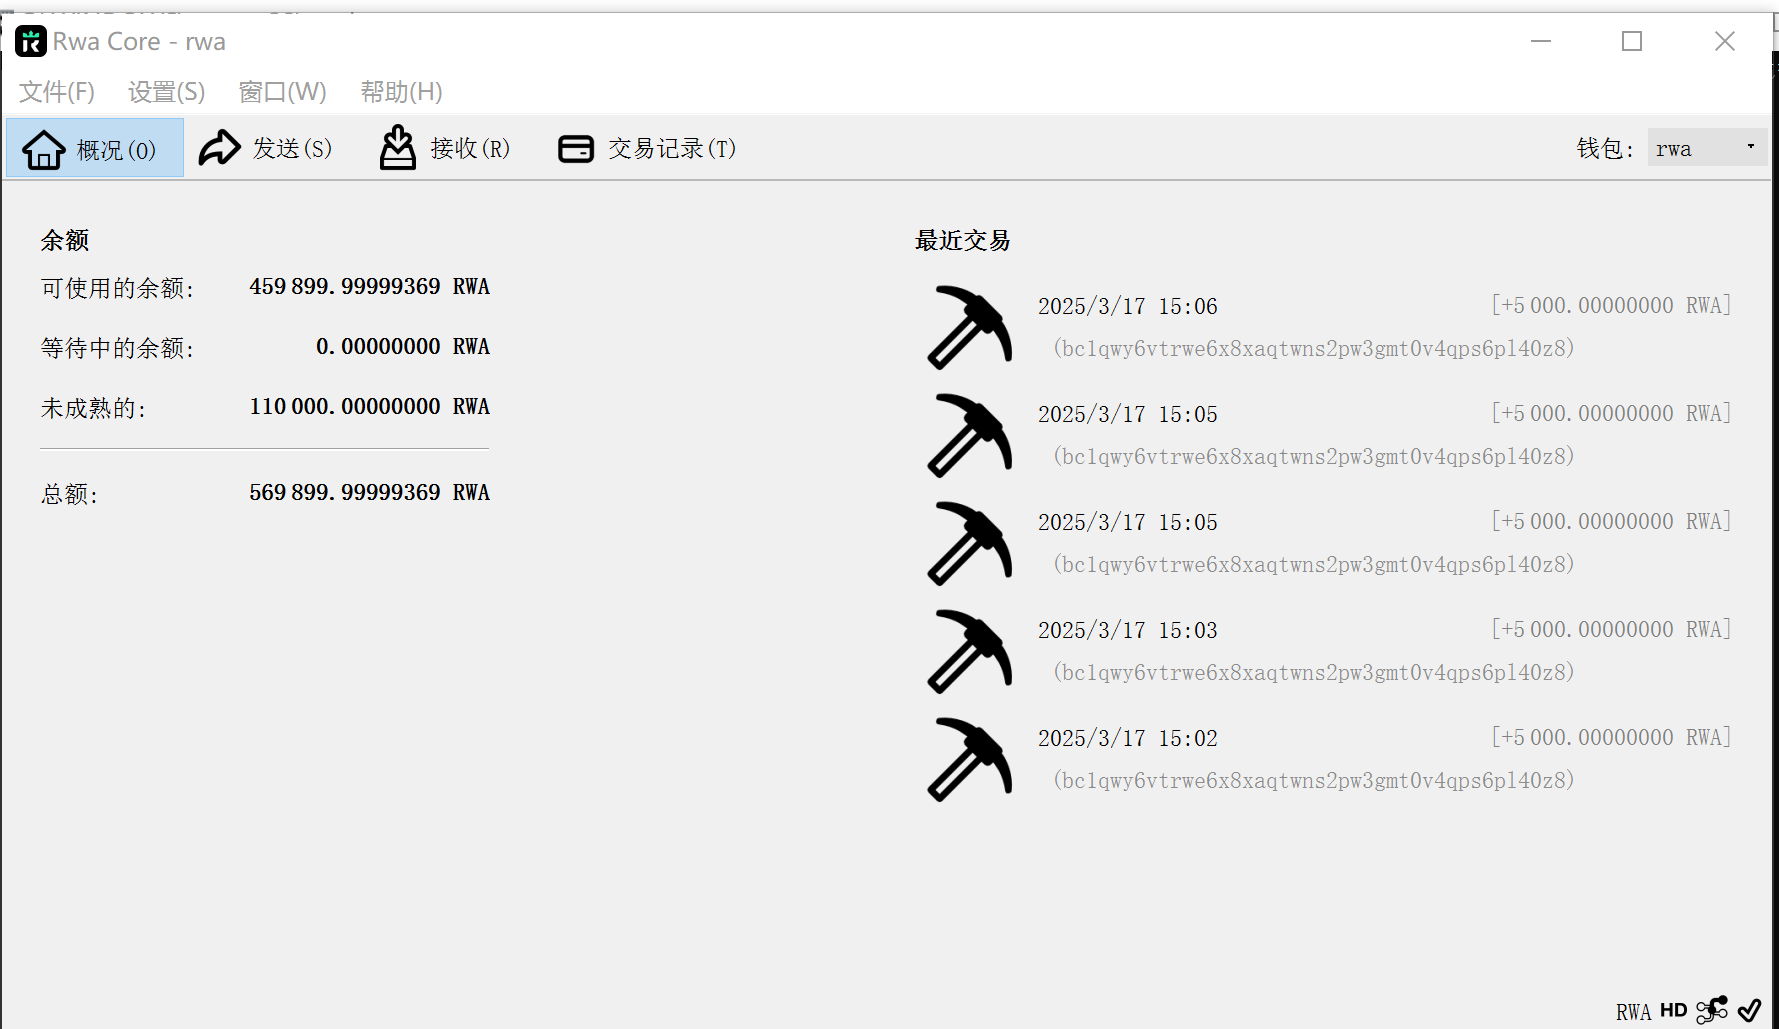
This image shows the wallet. It has many functions, which won’t be detailed here. You’ll find it easy to use with some exploration.
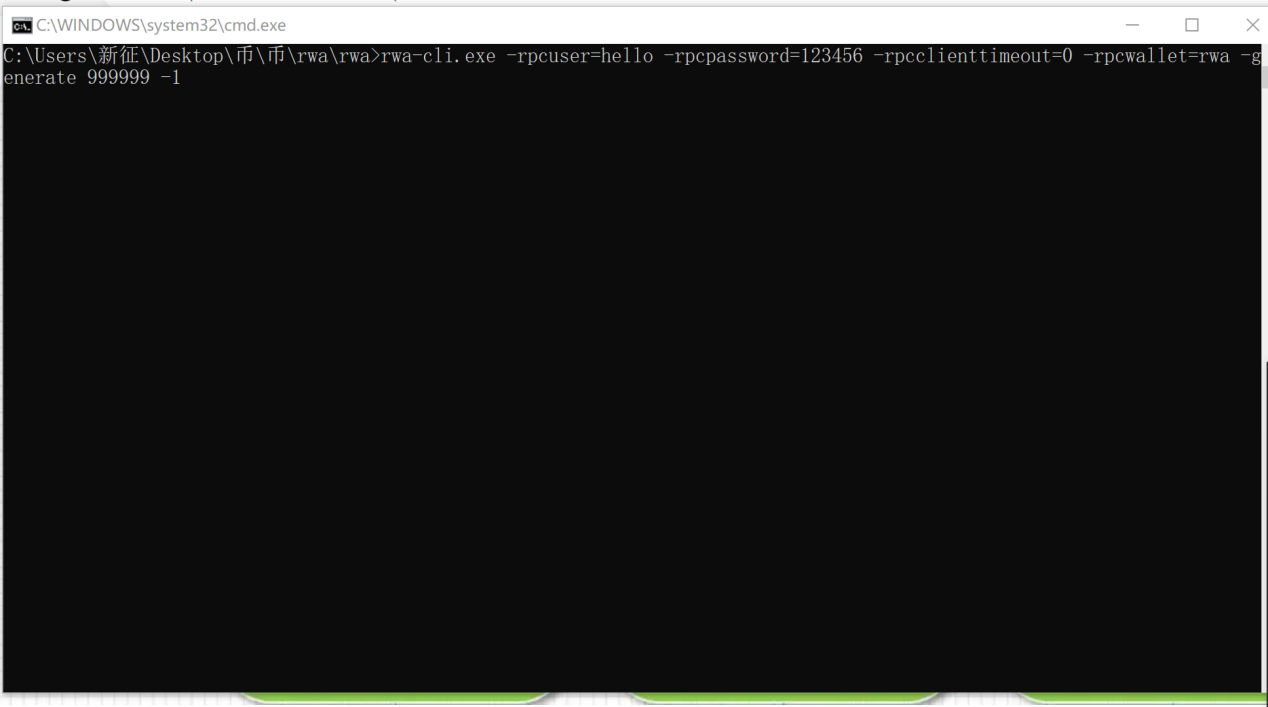
Please note: when the mining program is running and the above interface appears, it means mining is in progress. Be patient.
If you mine one block per day, you will earn 5,000 RWA. If you mine ten blocks, that’s 50,000 RWA. So, patience is key.
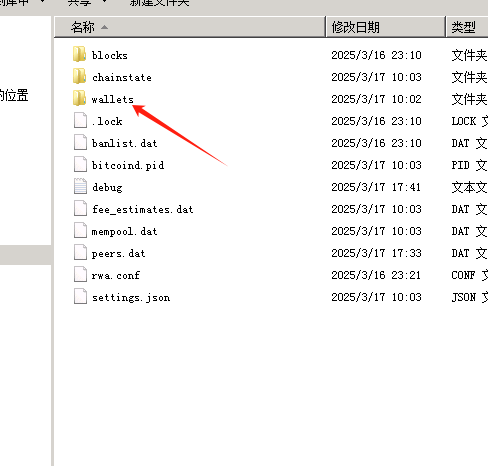
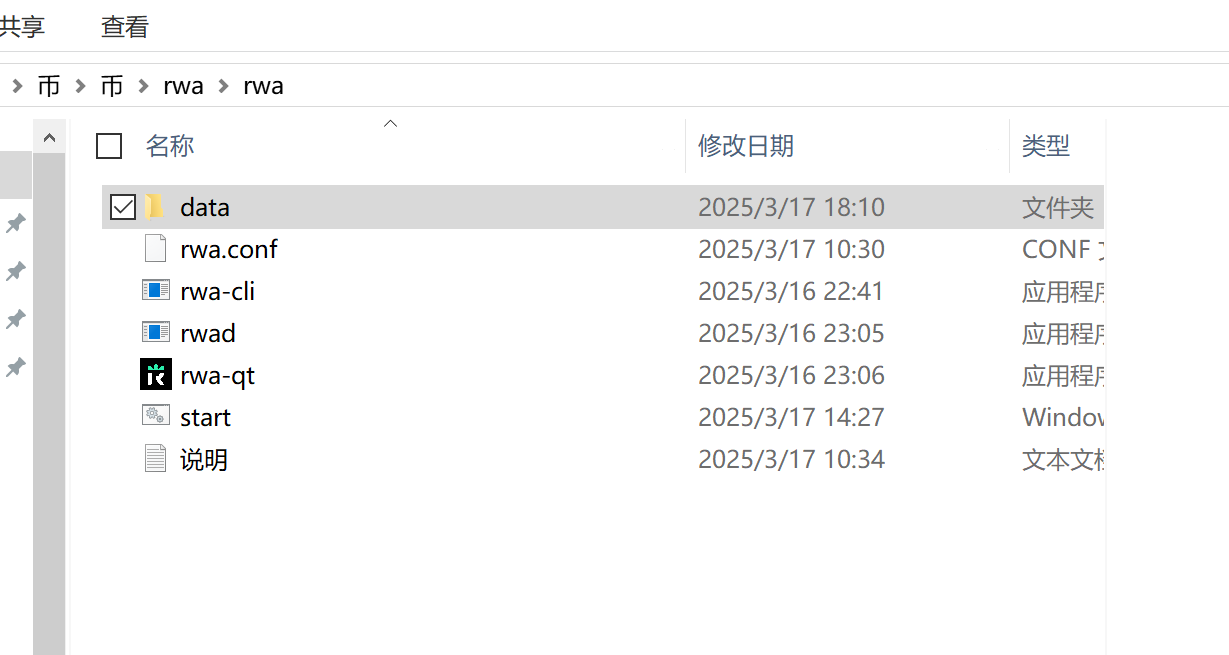
It’s highly recommended to back up the 'wallets' folder shown in the first image or the 'data' folder in the image below (using a USB drive or backing up to another computer). This allows you to recover your RWA if your computer fails or files are accidentally deleted (by replacing files).
Wallet Operations:
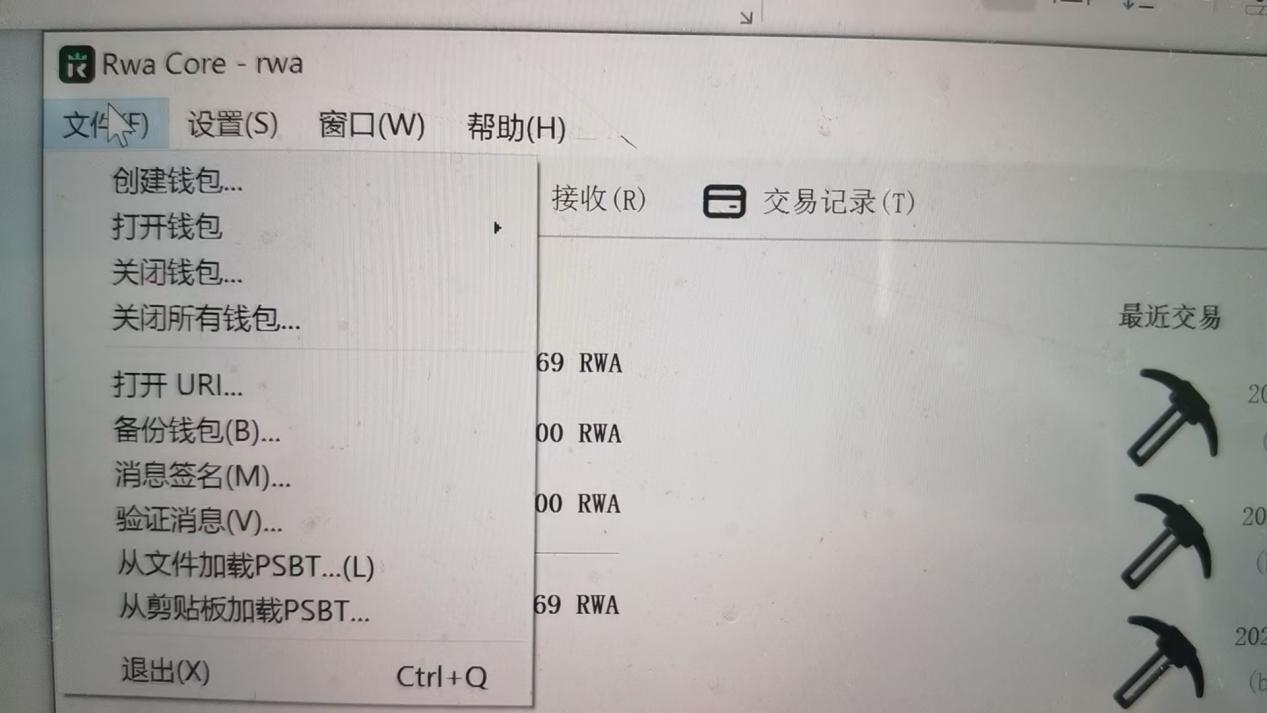
First, create a wallet. Click the '文件'(File) button in the top left, and select 'Create Wallet' from the dialogue box, as shown below:
After clicking '创建钱包‘(Create Wallet), the following screen appears, as shown below:
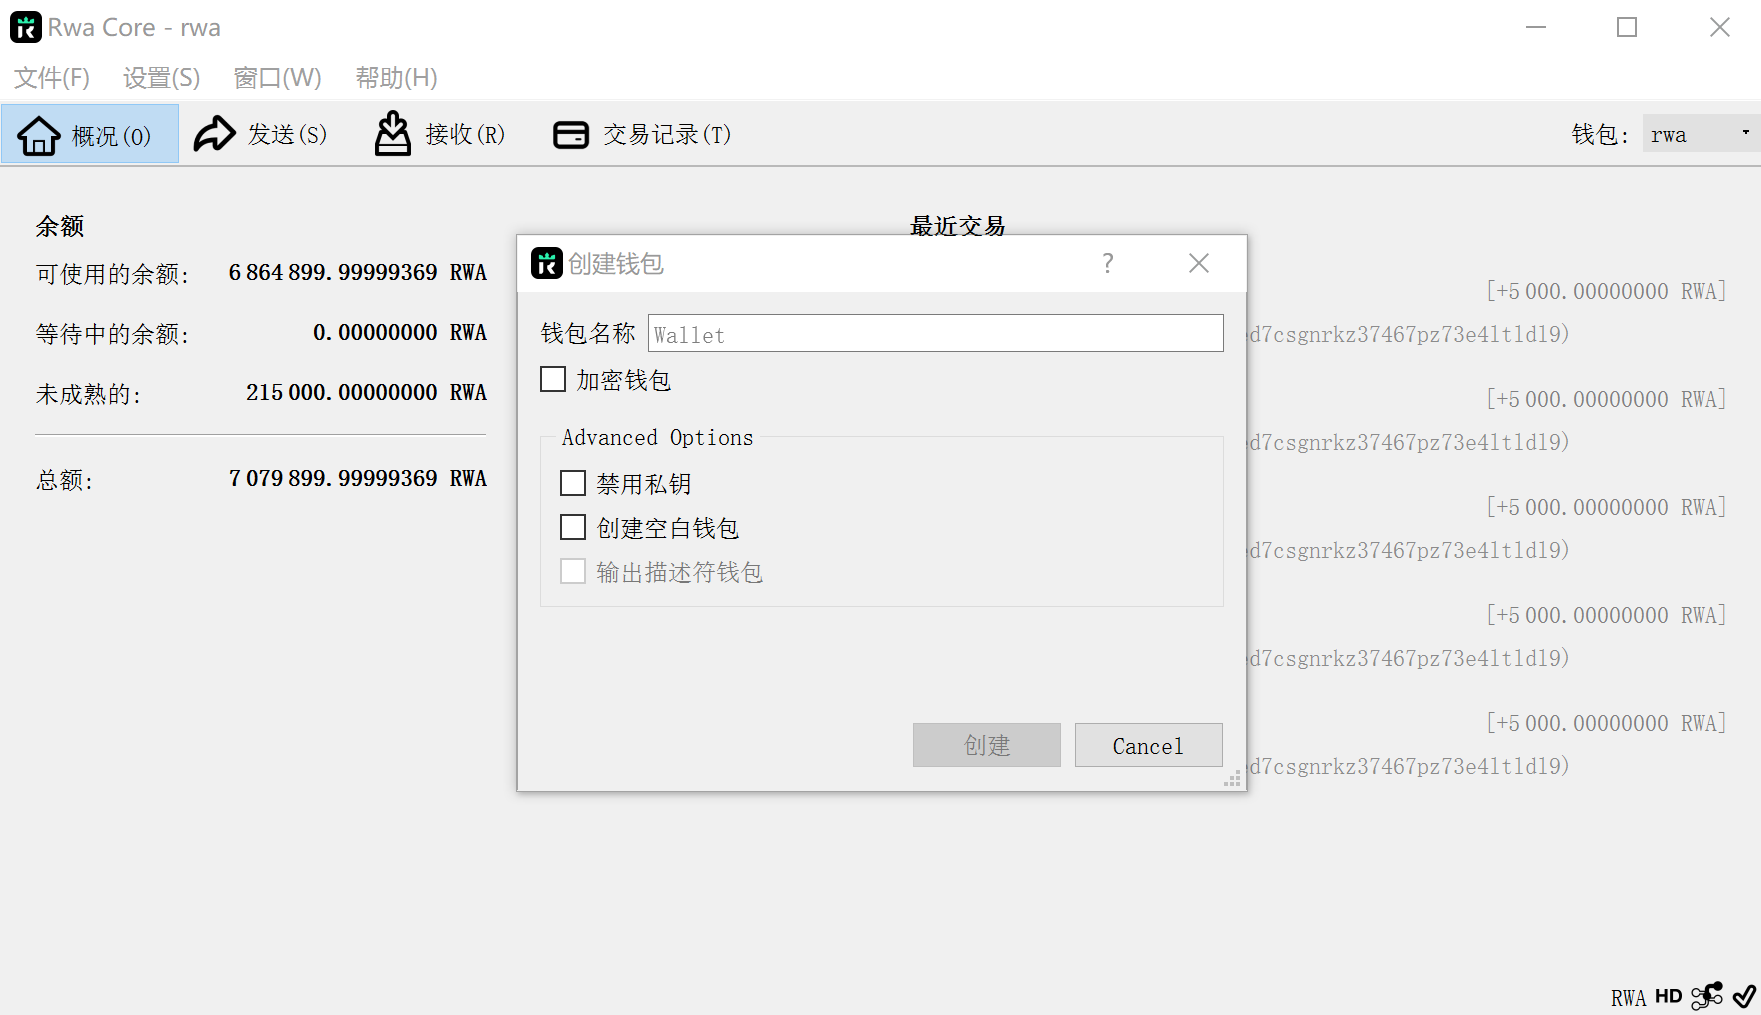
Please name your wallet.
About ‘加密’(encrypting) your wallet:
Encryption means setting a password for the wallet. When first using it, you can choose not to encrypt it. If you do, be sure to remember the password—forgetting it means losing access to your assets.
For Transfers:
1. To Receive Coins:
To receive Nova (RWA), click the '接受'(Receive) button on the interface, as shown below:
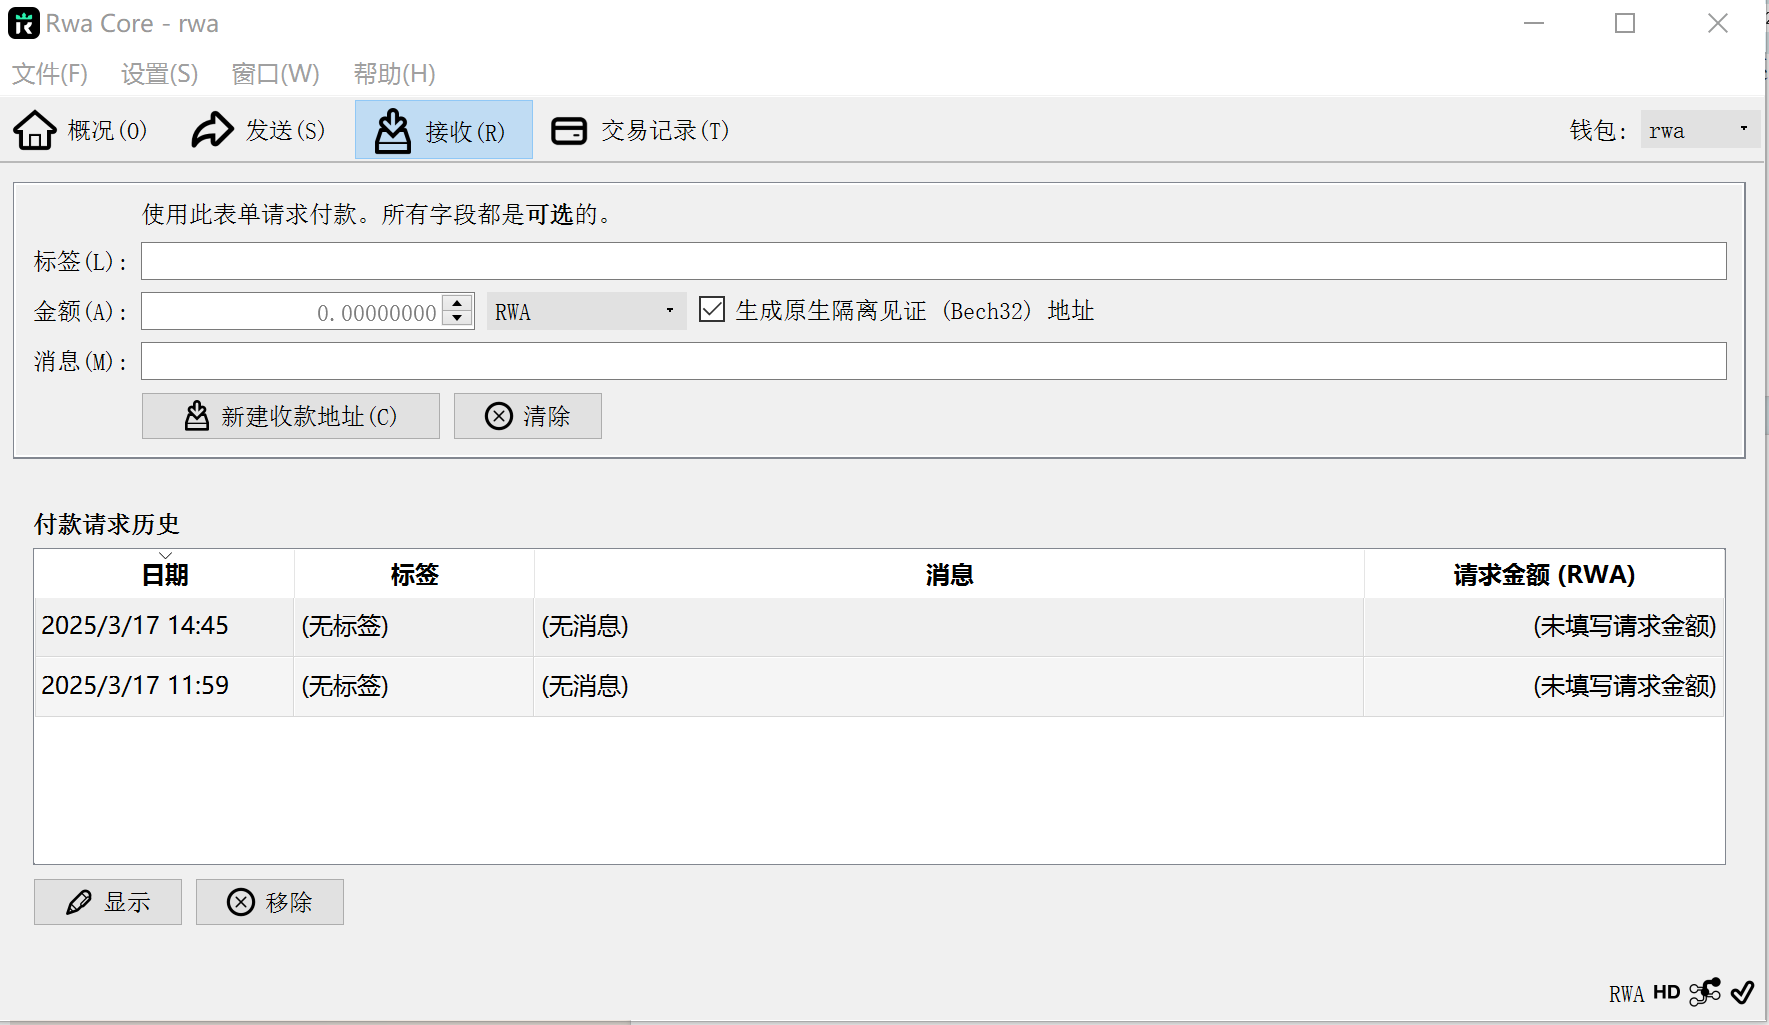
Then click '新建收款地址'(Create New Receiving Address) in the middle section to generate an address. Double-click an address in the '收款请求历史'(Request History) list to bring up a dialog box, as shown below:
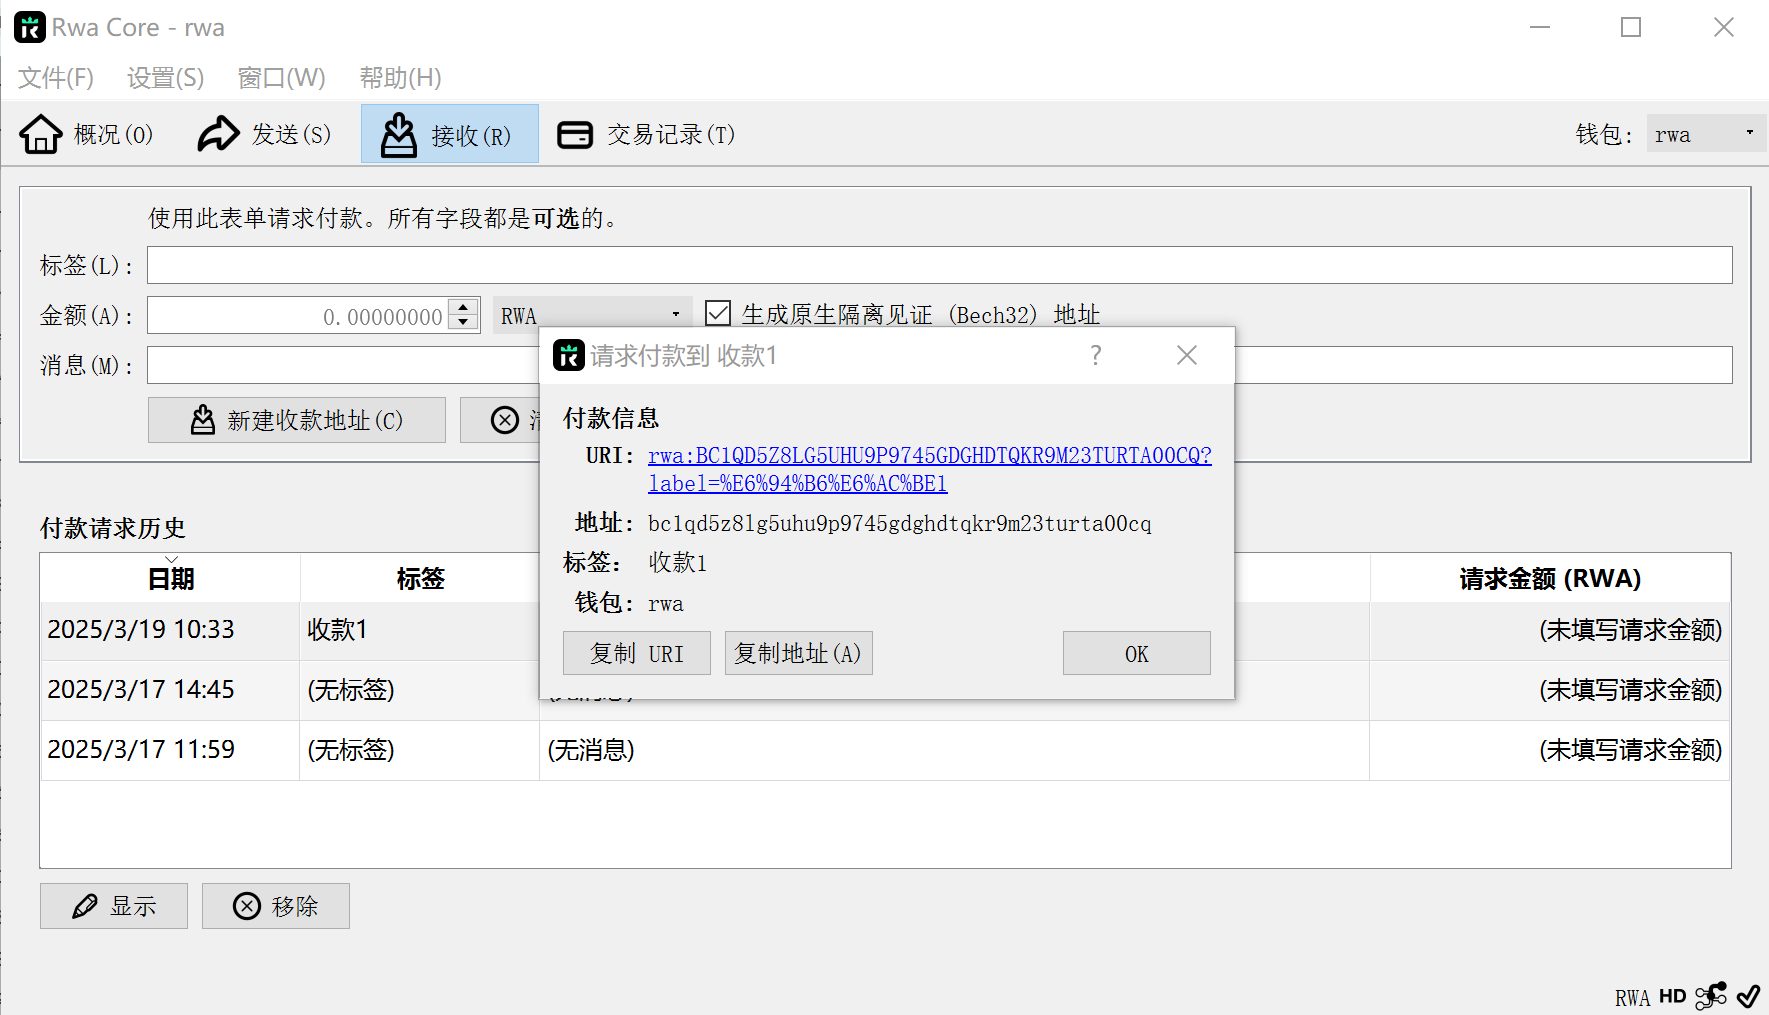
Copy the address and send it to the person transferring Nova to you. It’s best to test with a small amount first to confirm everything works correctly.
2. To Send Coins:
This is the send interface. You need to set a transaction fee, which can be customised. Without a fee, transactions won’t go through. The fee is paid in RWA—set it to 0.00001; if insufficient, increase accordingly, as shown below:
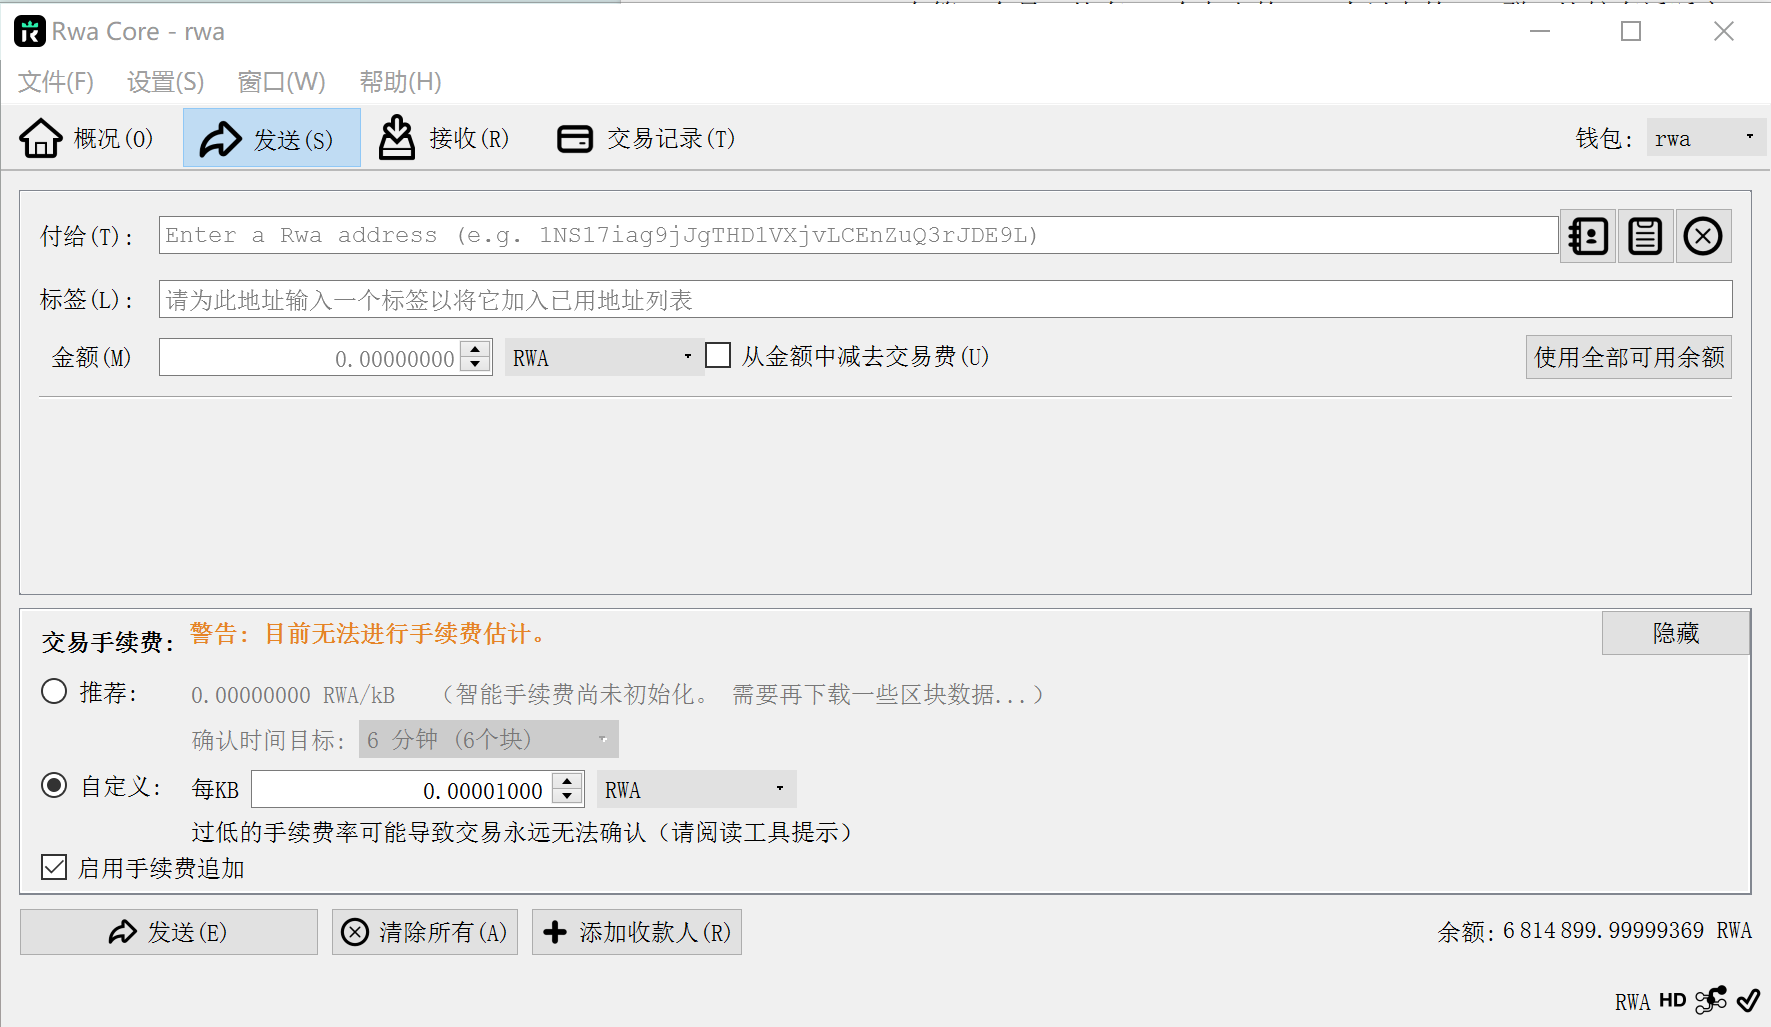
Paste the recipient’s address into the '付给'(Pay To) field.
You can also add a '标签'(Label) to identify the recipient.
Try sending a small amount first, like 0.1 or 1 RWA.
Additionally, you can explore the 'Overview' and 'Transaction History' tabs—these interfaces are self-explanatory and won’t be elaborated here!